This page describes in great detail the process of installing LinuxCNC on a mini PC. These instructions are written for the MinisForum G41 PC. This PC was chosen (in March 2023), since it is easy to source from Amazon and it has two LAN ports. This installation instruction is it is pretty generic and can therefore be used for other mini PC’s too. Installation steps which are different for other PCs will be indicated.
Here’s a link to the Amazon item:
Download image
Start by downloading the buster image of linuxcnc on a separate PC, so not on the mini PC, from linuxcnc.org
Click the following link:
https://www.linuxcnc.org/iso/linuxcnc-2.8.4-buster.iso
Prepare a bootable stick
After downloading the image, you need to flash it to a USB stick. There are many different ways to do this, I chose Balena etcher. First download Balena etcher here:
https://www.balena.io/etcher#download-etcher
Install Balena Etcher on a separate PC. Then plug in a USB stick which is large enough for the iso image. Open Balena etcher and select the iso you just dowloaded and your USB stick. Then click “Flash!”.

It takes a while, be patient. Eventually your stick will be ready:
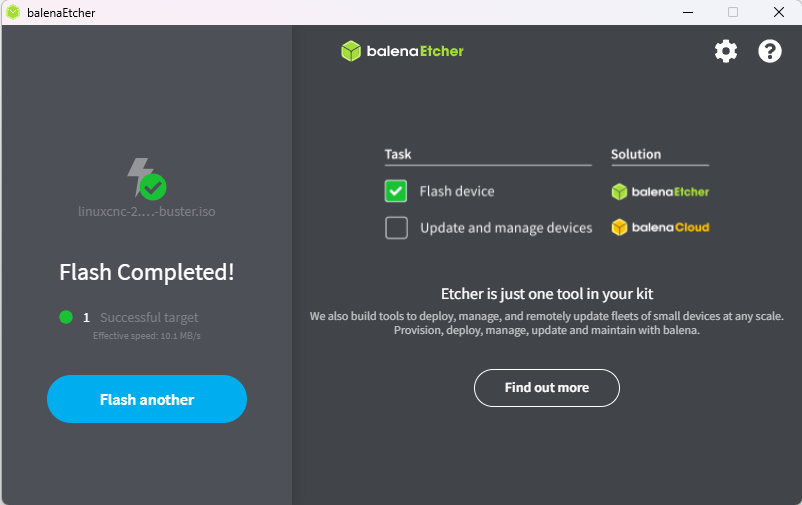
When ready, close BalenaEtcher and pull out your USB stick, there’s no need to eject it first (in windows at least).
Set-up the mini PC
Now that your USB stick is ready, unpack your mini-PC and hook up the power, a USB keyboard, USB mouse and monitor. The MinisForum GK41 can be connected to your monitor with a displayport cable or a HDMI cable, choose one that your monitor supports. The cables are included in the box of the GK41.
Once that is done, plug in your bootable USB stick. You are ready to begin installation.
Make sure that during installation of Linux, you do not have the USB-RS485 connected, this will cause problems otherwise. So only connect your bootable USB stick and keyboard and mouse.
Boot from USB stick and install the LinuxCNC image
The MinisForum GK41 PC will show a boot menu when you keep “F7” depressed while you turn on the PC. Keep F7 continuously depressed, turn on the PC and wait for the boot screen to appear. When you see the boot screen, you can release the F7 key. If you see anything remotely related to Windows booting, turn off the PC and try again. You need to get into the boot menu which looks like this:
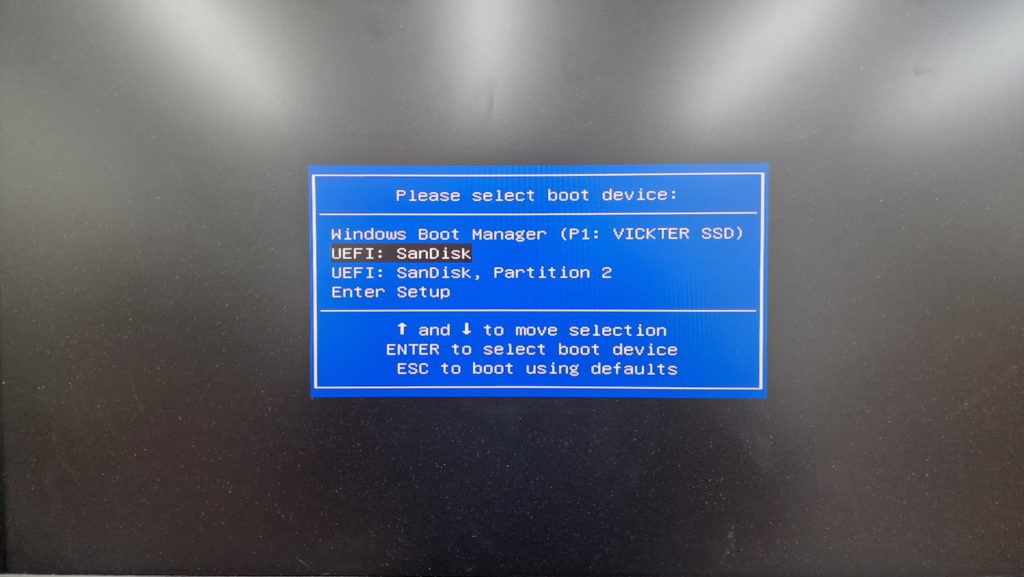
Select the boot stick and press enter. After a while the following screen should appear:
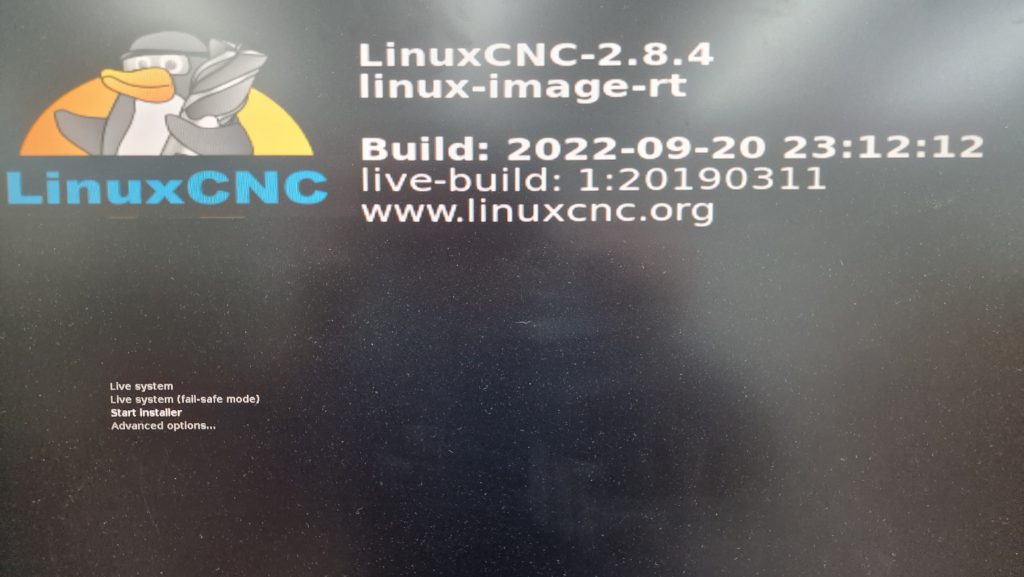
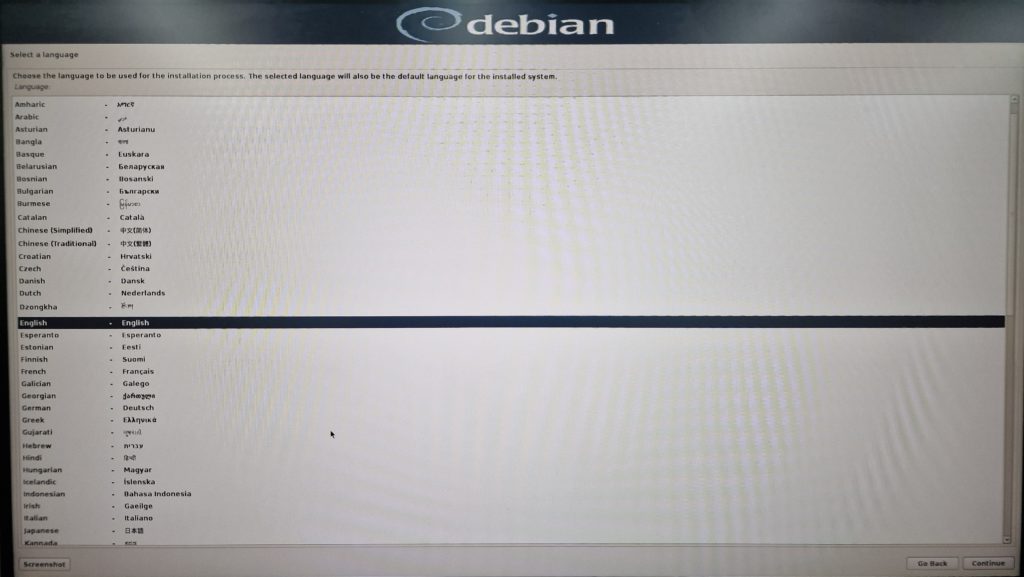
With the arrow keys, select “Start installer” and press enter. The installation will start. The following screenshots are taken at the windows where input was needed from the user. First select your language.
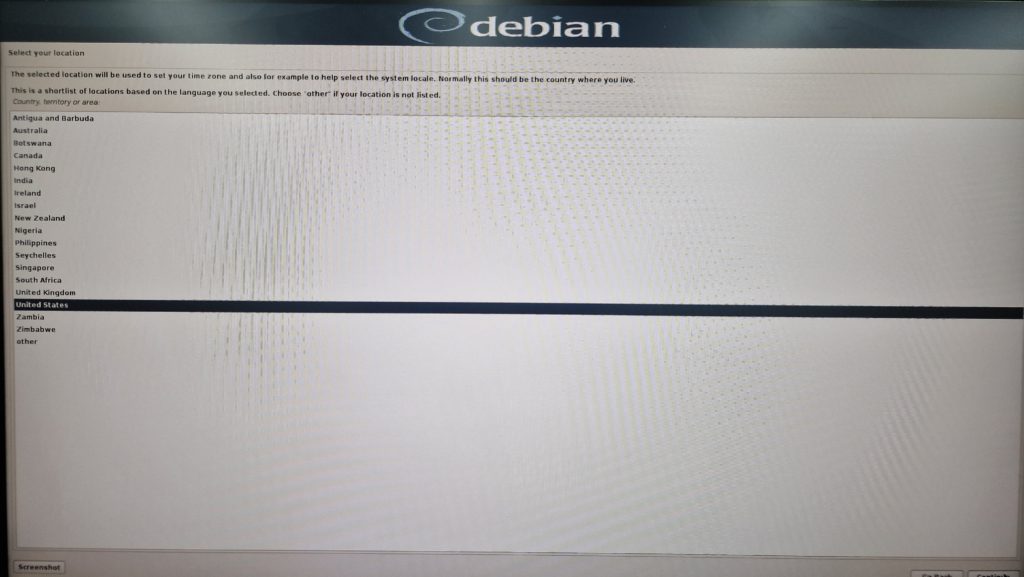
Now select your location:
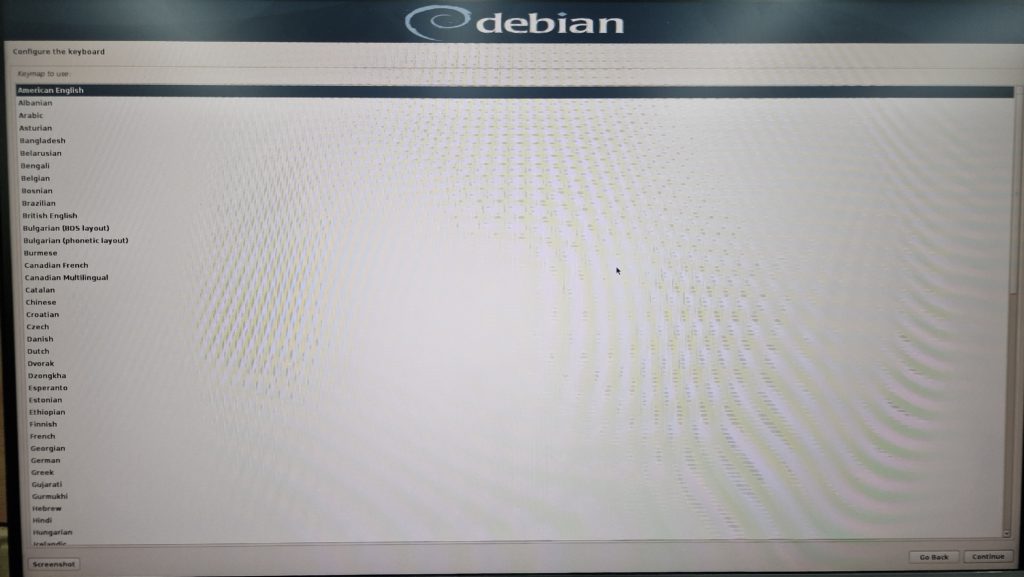
Choose your keyboard layout:
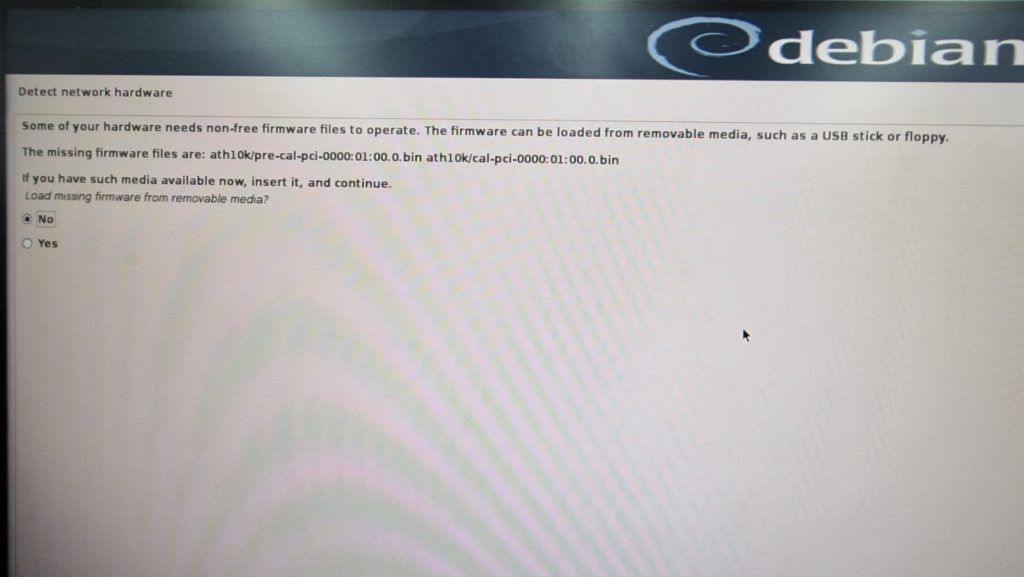
The next screen asks for firmware files. No need for this. Just select “no” and continue the installation:
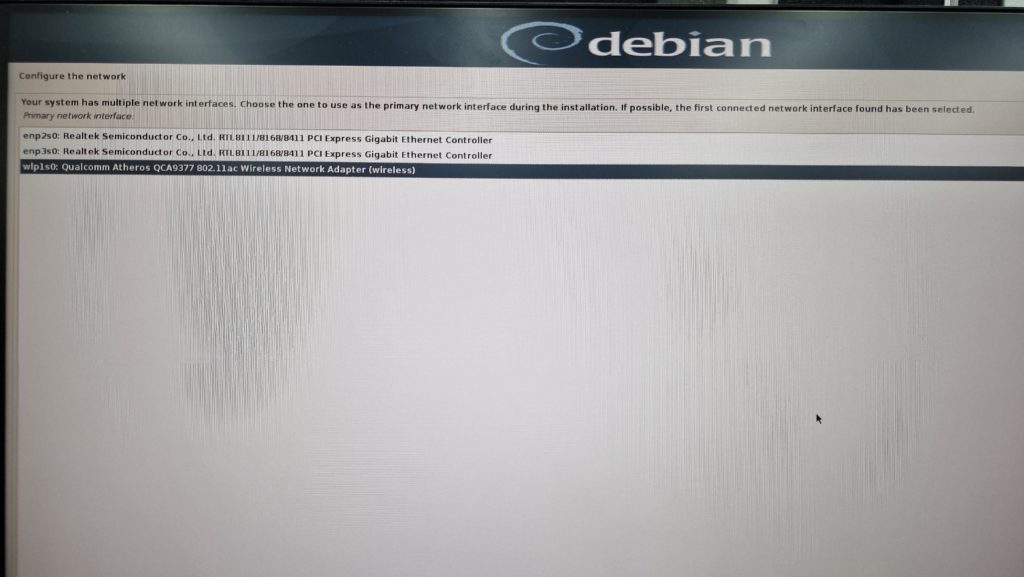
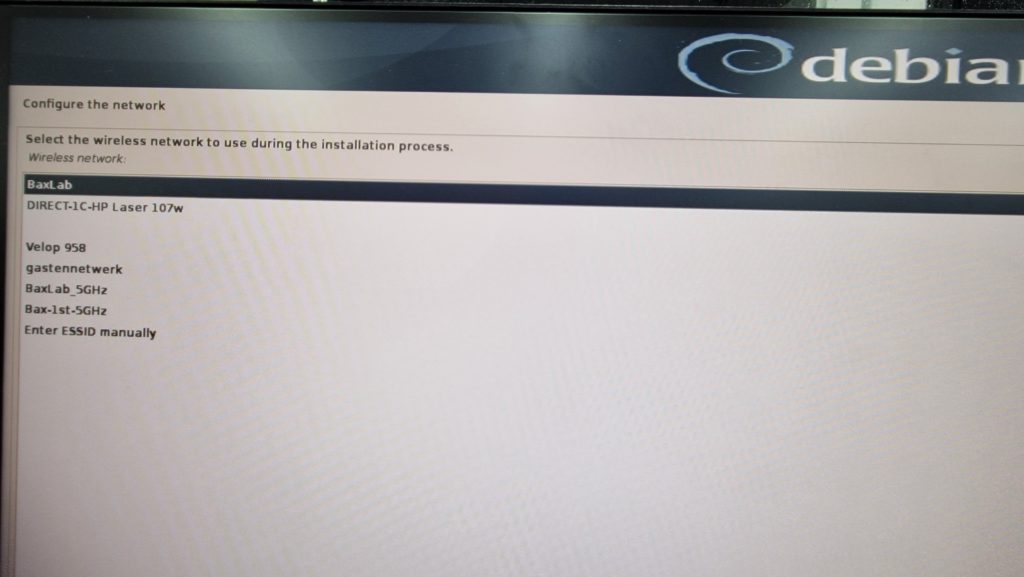
In the following screen choose the network interface needed for a internet connection during the installation. Choose the Wireless Network Adapter for convenience:
Select your wireless network name:
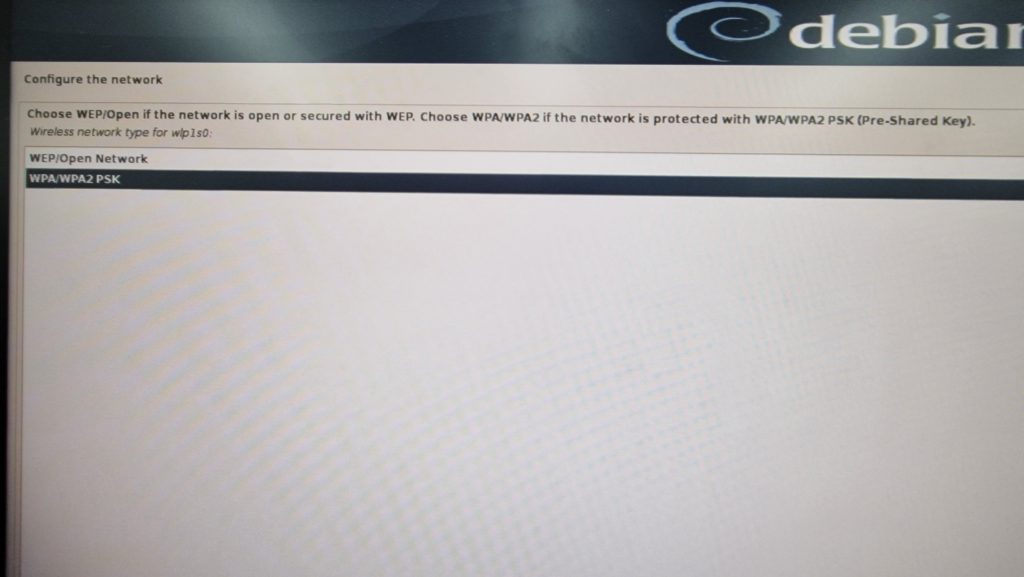
Assuming your network is properly secured, choose the WPA option:
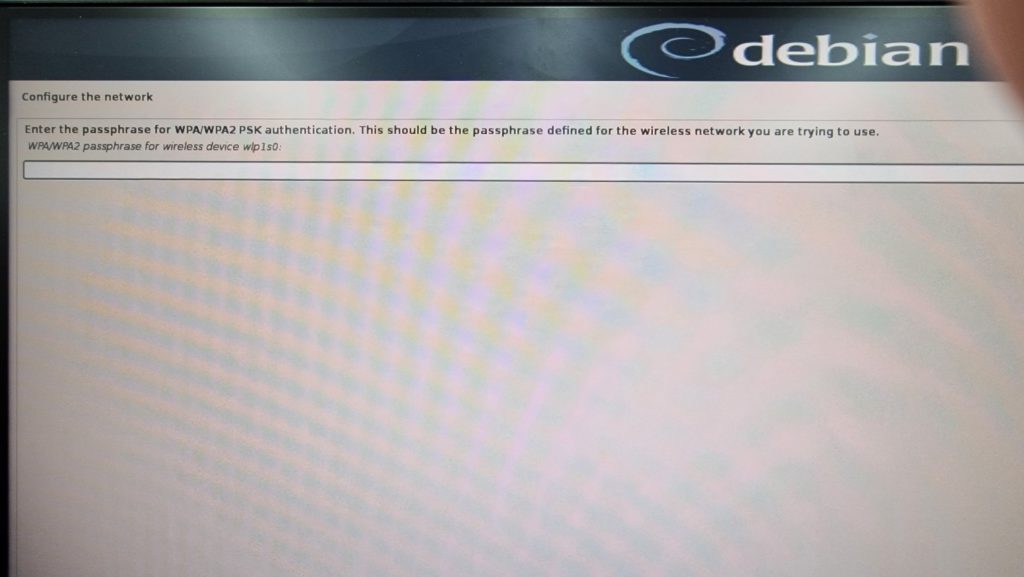
Enter the password for your network and continue:
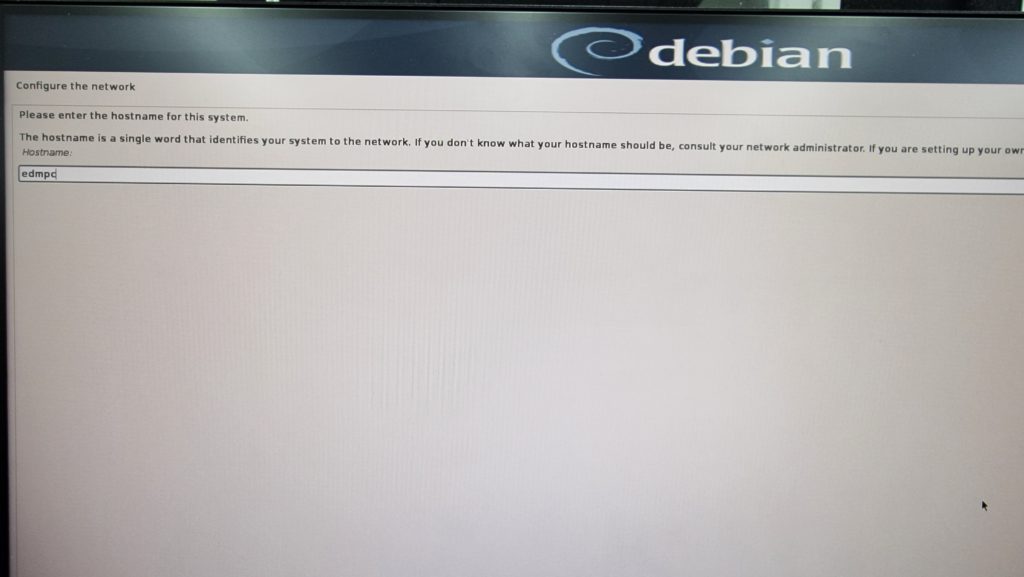
Choose a hostname for your system. This example installation uses “edmpc”.
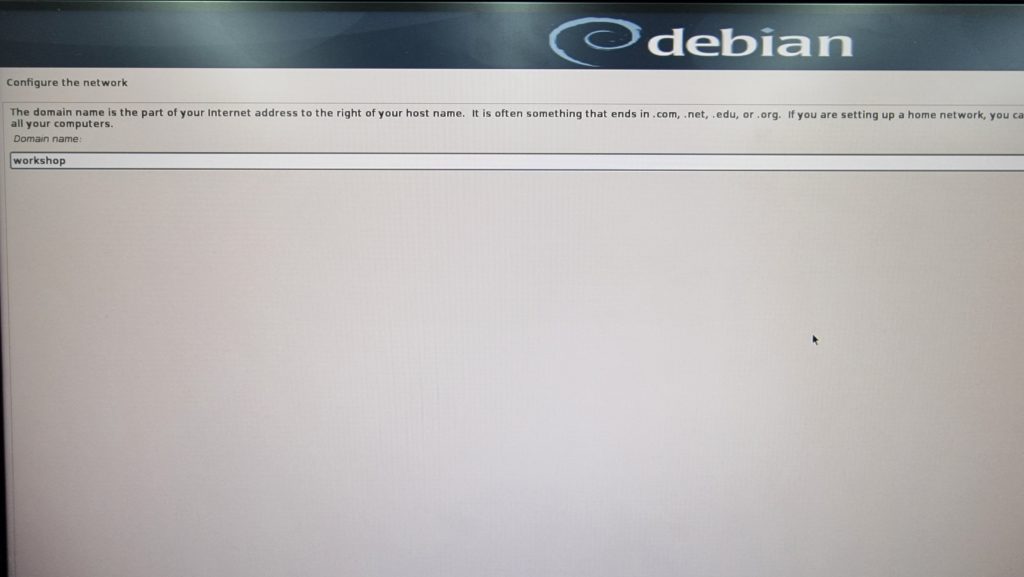
Choose a domain name for your PC. This example installation uses “workshop”
Choose a user account name. This example installation uses “edmuser”.
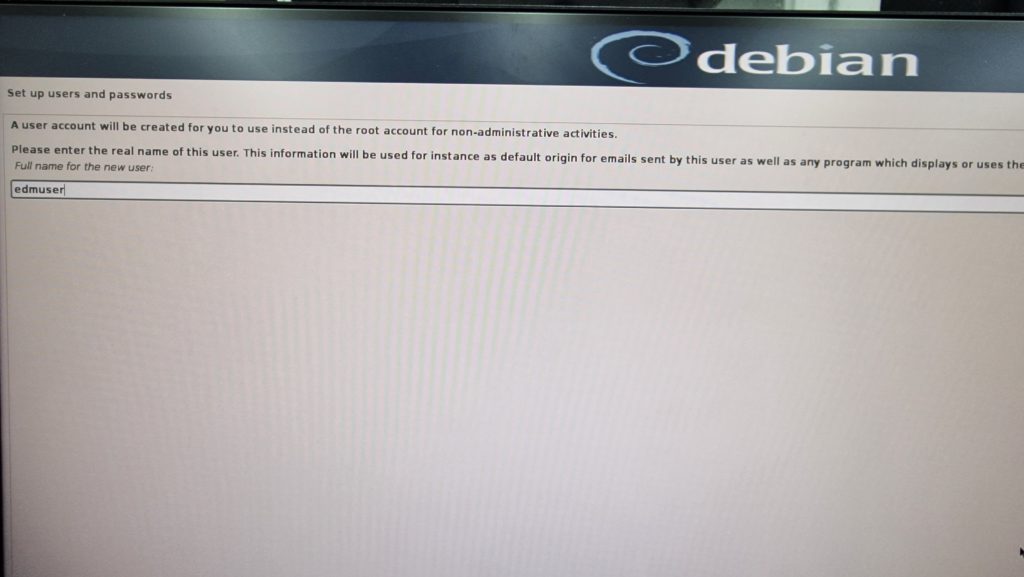
Choose a user name. This example installation uses “edmuser”.
Create a user password:
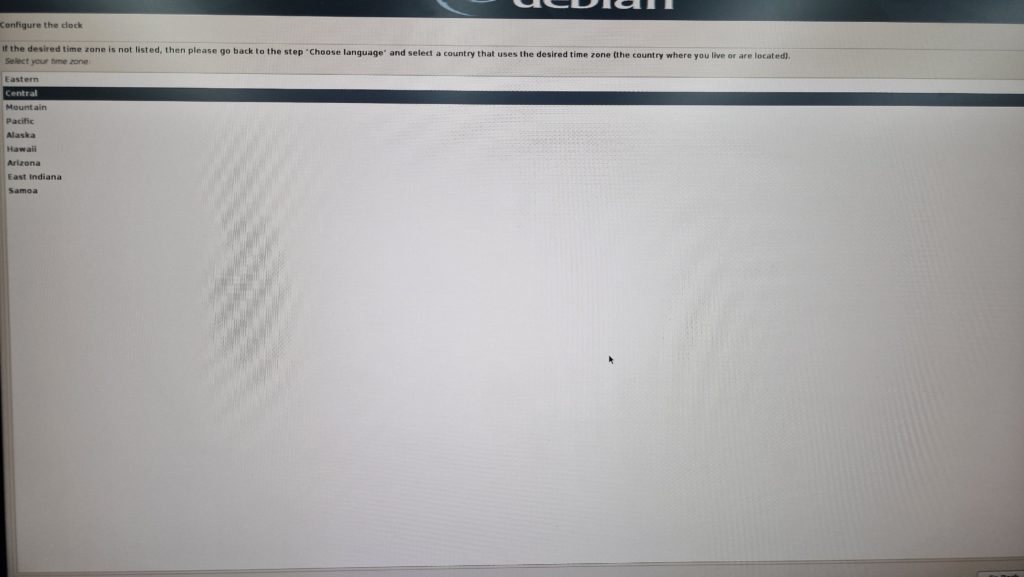
Select your timezone:
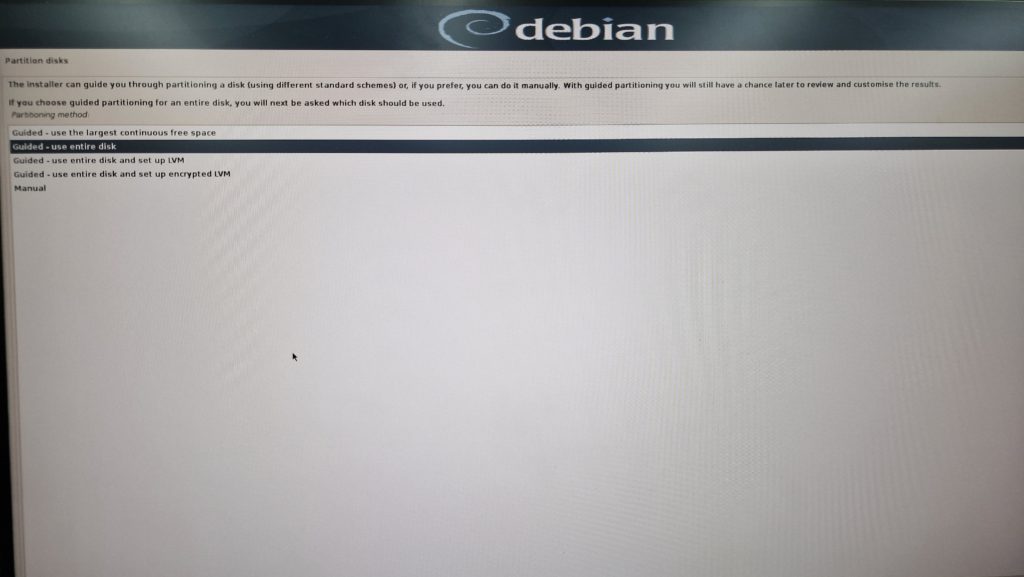
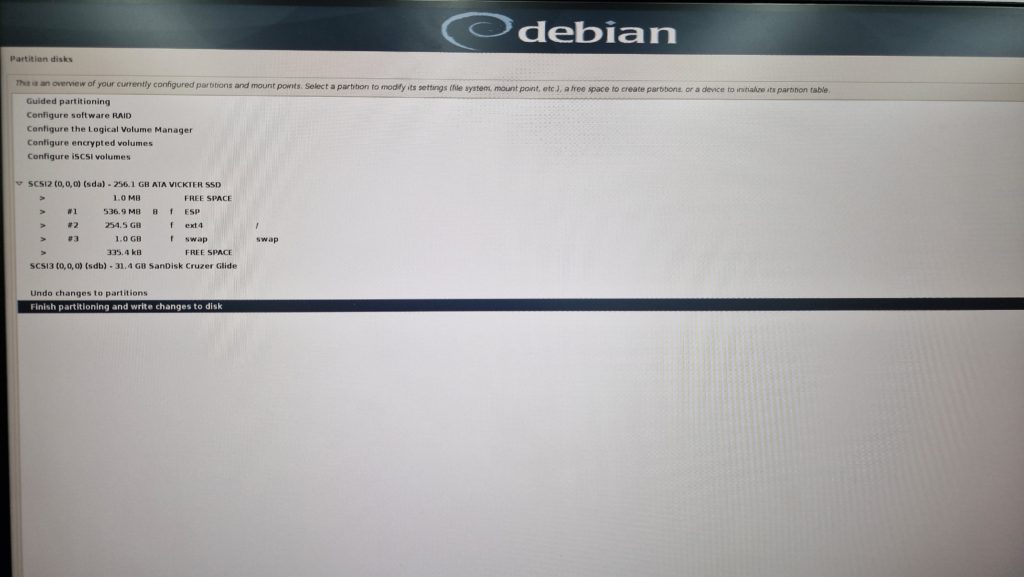
The next screen asks how you would like to partition your disk. The GK41 mini pc comes standard with Windows, this is pretty useless for this EDM machine application, so this example installation choses to get rid of windows and to use the complete disk for Linux. In order to do that, choose “Guided – use entire disk”.
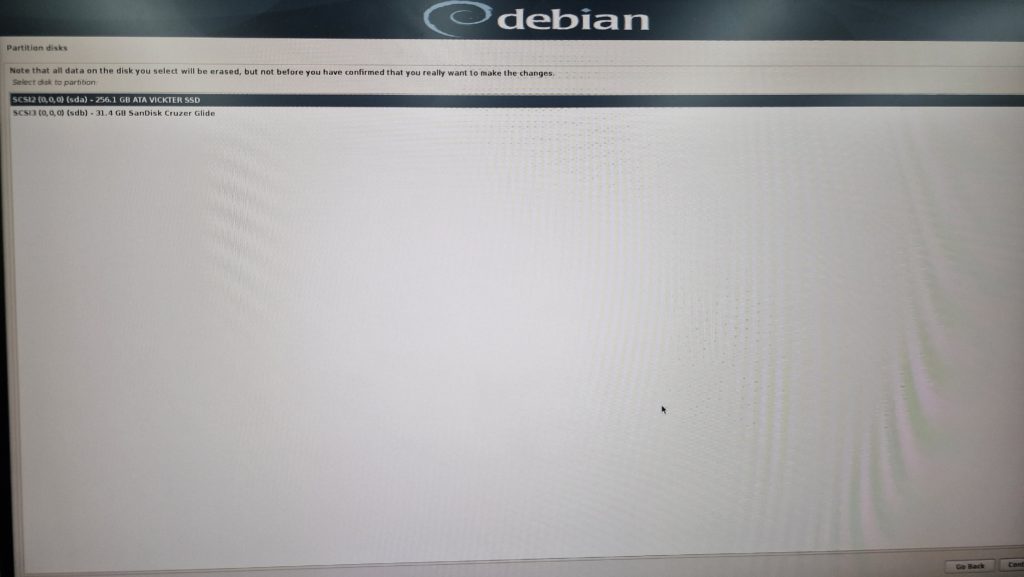
Select your SSD not the USB stick, then continue. Note that the GK41 PC comes in different SSD sizes, the one in this example installation happens to have a 256GB SSD.
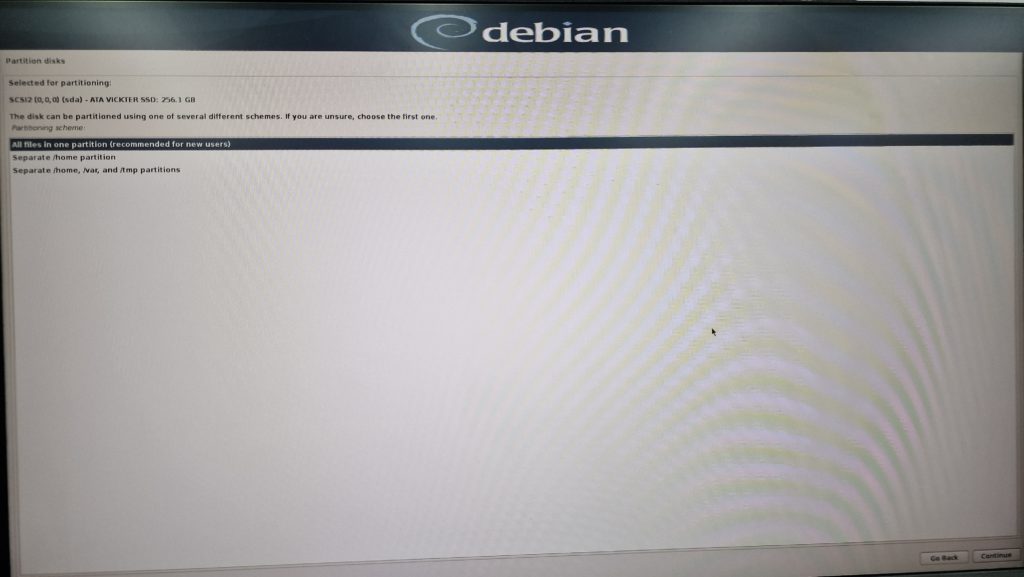
The next screen asks you if you want to create separate partitions for specific folders, that is not needed. Select “all files in one partition” and continue.
In the next screen select “Finish partitioning and write changes to disk”.
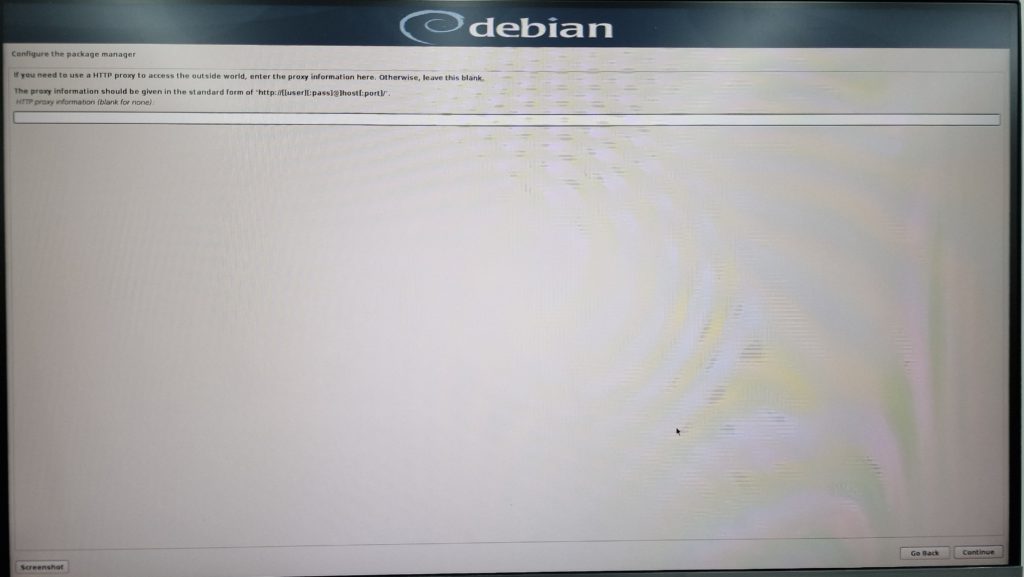
In the next screen, select “yes” and continue:

The installation will begin. It takes a while. Eventually the following screen appears. In this example installation we leave it empty and just click continue:
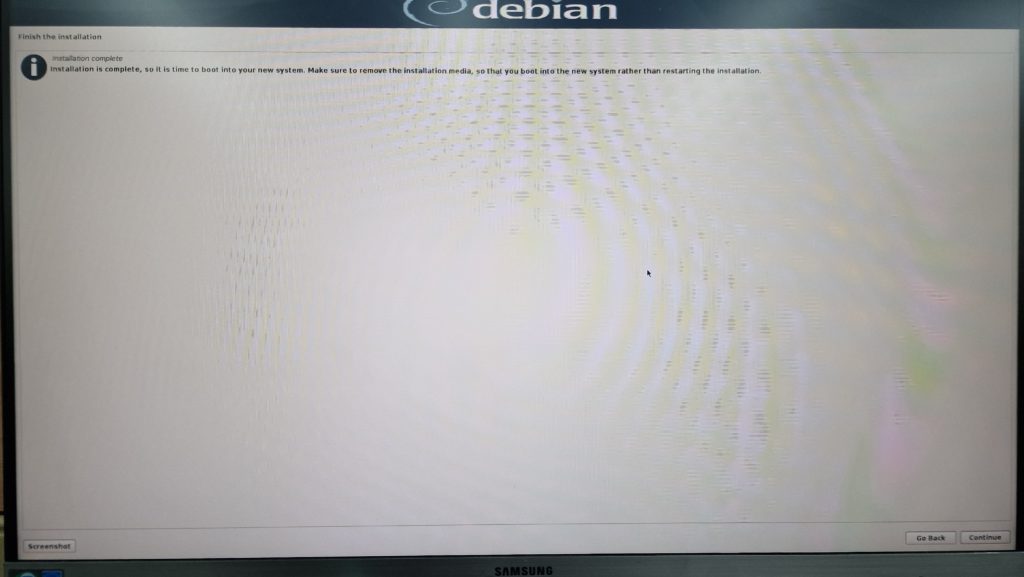
Finally the installation complete screen is show, click continue and the PC will reboot into your new Linux installation.
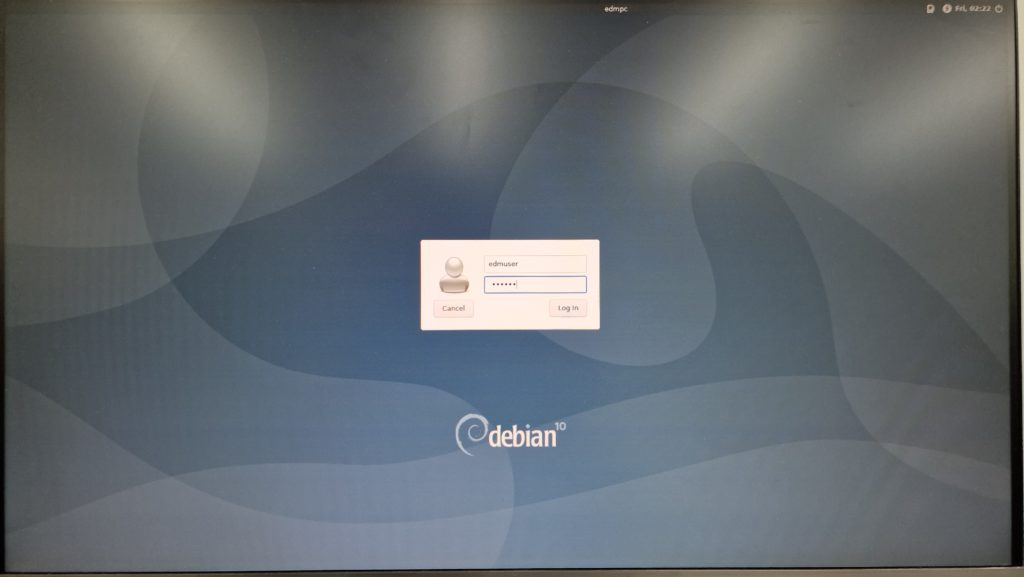
After the reboot, you can login with the username and password you have chosen during installation.
After your first login click on the applications button in the top left corner. Then navigate to settings -> settings manager -> session and startup -> application Autostart. Now unselect nm-tray and close the window.
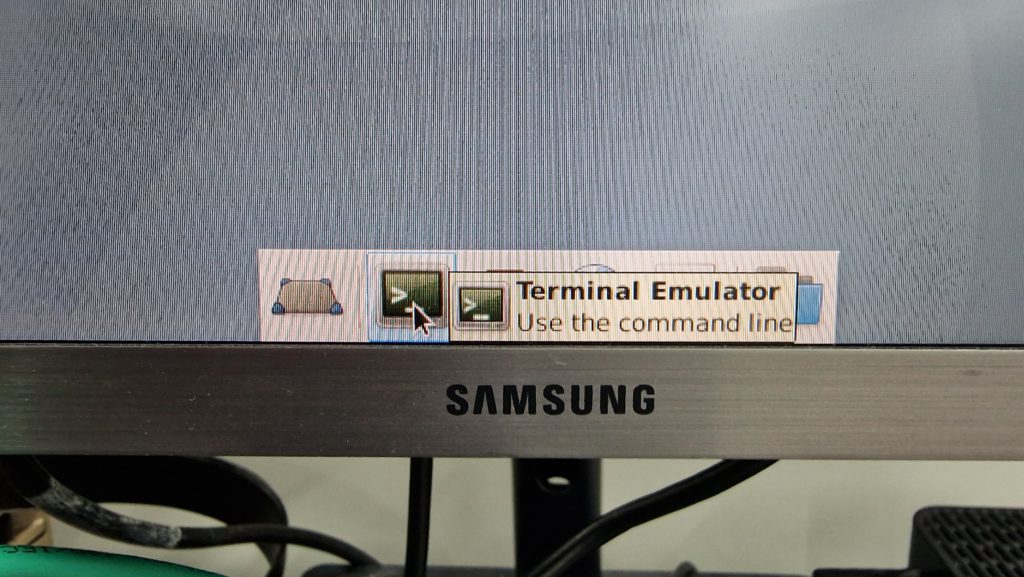
For the next installations and configuration the command terminal will be used. You can open it by clicking the terminal emulator icon.
Install EtherlabMaster
Etherlabmaster is needed in order to setup the EtherCat master device. Before you install it you need to know the name of the LAN port which you want to dedicate to EtherCat. You can list your ethernet interfaces by executing the following command in the terminal:
ip link show
Note down the name of the port you want to use. On this installation on the GK41 mini pc, we choose the “enp2s0” interface to use with Ethercat, this is the right side LAN port on the back of the GK41.
First install GIT, which is needed in order to download the necessary software. In stall it with the following commands:sudo apt-get update
sudo apt-get install git
Enter ”y” to continue.
If you have downloaded the iso image from the link in this installation guide the kernel version is 4.19.0-21-rt-amd64
If you have used a different installation, check and note down which kernel you are running with the command:uname -r
Now, install the linux headers that match your kernel with the command:sudo apt install linux-headers-4.19.0-21-rt-amd64
Enter “y” to continue.
Now install Mercurial with the command:sudo apt-get install mercurial
Enter “y” to continue.
Now install dkms with the command:sudo apt-get install dkms
Enter “y” to continue
Now that you have installed the required tools, install Etherlab master for your selected LAN port by executing the following command sequentially. Note the line containing enp2s0, if your desired LAN port has a different name replace the name in that line.
Before executing your commands, make sure that the terminal prompt is in the /home/edmuser/ directory where “edmuser” is your username. Change to this directory with the cd command:cd /home/edmuser/
Now run the following installation commands, you can copy line by line from your browser window and paste them by right clicking with your mouse on the terminal window and select paste on the menu that appears:
git clone https://github.com/icshwi/etherlabmastercd etherlabmaster
make init
echo "ENABLE_CYCLES = NO" > configure/CONFIG_OPTIONS.local
make build
make install
echo "ETHERCAT_MASTER0=enp2s0" > ethercatmaster.local
make dkms_add
make dkms_buildmake dkms_install
make setupsudo mkdir -p /usr/include/linuxcnc
sudo ln -s /opt/etherlab/include/*.h /usr/include/linuxcnc/
sudo ln -s /opt/etherlab/lib/lib* /usr/lib/
Now reboot your PC.
The most basic wire EDM machine will use two EtherCat servo drives for the X and Y positioning and one BX-18 arc generator. The ECT60 is a low cost Ethercat servo drive and will be used for this example installation.
Connect the X drive first. Remember to connect it only the the LAN port which has been assigned for EtherCat use, which is the port on the right hand side for this installation on the GK41 mini PC. With Ethernet cables, daisy chain the Y drive after the X and the BX18 arc generator after the Y drive. Now turn the servo drives and the arc generator on.
When these are connected and powered on, issue the command:ethercat slaves
if everything was installed correctly, this should then show:emduser@edmpc:~$ ethercat slaves
0 0:0 PREOP + ECT60V202(COE)
1 0:0 PREOP + ECT60V202(COE)
2 0:0 PREOP + BX18 Arc Generator
Install LinuxCNC-EtherCat
Before we can install and make linuxcnc-ethercat, we need to install a package that linuxcnc-ethercat depends upon (needed for the expat.h file). Execute the following command to install the package:sudo apt install libexpat1-dev
Before issuing the next commands, set your terminal prompt back to the home directory.
Now run the following commands in succession to make and install linuxcnc-ethercat:
sudo git clone https://github.com/sittner/linuxcnc-ethercatcd linuxcnc-ethercat
sudo make configure
sudo make
sudo make install
Install the CIA402 HAL component
cd to the home directory again, then run the following commands to install the HAL component for LinuxCNC needed for the servo drives:sudo git clone https://github.com/dbraun1981/hal-cia402.git
cd hal-cia402
sudo halcompile --install cia402.comp
Download and install BaxEDM specific HAL components and scripts
Log in to the BaxEDM forum with your username and password (customers only). Download the BaxEDM software package, which is a *.zip file. Save the zip file to your Linux PC to the path /home/edmuser/Downloads/
In the terminal install unzip with the following command:sudo apt-get install unzip
Now extract the package with the following command. It will add the folder “linuxcnc” to your home folder:unzip /home/edmuser/Downloads/linuxcnc.zip -d /home/edmuser/
Change the prompt directory:cd /home/edmuser/linuxcnc/configs/BaxEDM-2axis-WireEDM/
Now build and install the BaxEDM HAL components:sudo halcompile --install baxedmstatus.comp
sudo halcompile --install baxedmfeedcontrol.compsudo halcompile --install baxbuttonlatch.comp
now install bc, needed for correct execution of the M-code scripts:sudo apt-get install bc
change to the nc_files folder:cd /home/edmuser/linuxcnc/nc_files
Now make all the M-code scripts executable, the following command does this for file M117, repeat the command for all M files in the directory. List the files with the “ls” command.chmod u+x M117
Start LinuxCNC
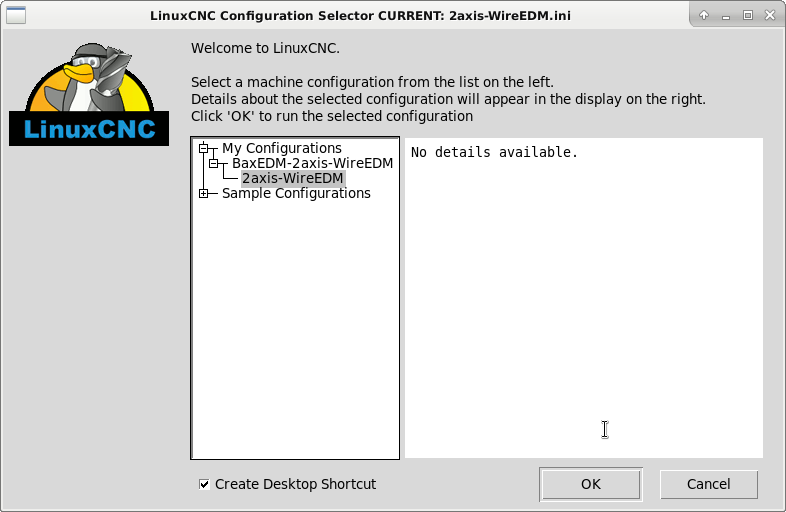
LinuxCNC can be started by clicking on the Applications > CNC > LinuxCNC button in the top left of your screen.
In the window that opens, expand “My Configurations” and select the 2axis-WireEDM configuration. Check the “Create desktop Shortcut” box to easy access next time.
Done! LinuxCNC and the BaxEDM HAL components are installed and ready to use!
For setting up the BaxEDM C-arc controller you can use CuteCom. Which can be installed with the command:sudo apt-get -y install cutecom
After this command you can start CuteCom in the applications -> system menu. You can drag the icon to the desktop to make a shortcut. The CuteCom settings needed to communicate with the C-arc controller are Baudrate 9600, 8 data bits, no parity. For further info on how to setup the C-arc controller consult the C-arc controller manual.
If you are using the Minis Forum GK41 PC and you want it to automatically start-up when power is applied so you do not need to press the button every time you can set this up in the BIOS. In order to enter into the BIOS settings turn your PC off, then on while rapidly pressing F7. A menu will appear, choose the settings option. When you are in the BIOS setup menu, go to the Boot tab. On that tab set the Auto power on feature to “On”. Then go to the Save & Exit tab to save your changes, exit the setup program an boot your PC. Next time you apply power, the PC will automatically boot.
Lastly; In case you missed the comment earlier to disable the nm-tray and multiple nm-tray icons are in our taskbar. The Debian image provided from LinuxCNC.org has a small nuisance, the connection icon duplicates each time you startup, so the taskbar fills up with a lot of these over time. Here’s the solution for that:
Copied from the forum:
nm-tray icon (network-manager); everytime you login it adds a new icon in the tray. I ended up with 9 of them at one point.
Fix: uninstall nm-tray with sudo apt-get remove nm-tray. logout/login reinstall with sudo apt-get install nm-tray.
logout and log back in and you should have one. Then go into MENU: settings/session and startup then select Appllication Autostart tab and remove nm-tray check in checkbox. close, logoout/login and it won’t keep adding it.
This fix works great, many thanks the the folks over at the linuxcnc forum:
https://forum.linuxcnc.org/38-general-linuxcnc-questions/44230-debian-10-buster-linuxcnc-iso-little-issues?start=0